
Macpherson Eclipse Emulsion
While most of us have likely painted over wood, masonry, or plaster surfaces, we may not have had occasion to paint metal surfaces. However, given that many exterior trimmings and interior furnishings are made of metal, it’s a wise idea to be able to know just how to paint metal objects. Once you know how to paint metal, you’ll be able to transform metal surfaces efficiently and beautifully.
Prep: Before beginning any project, it’s important to make sure you have the right tools. We recommend taking stock of everything you need and laying these items out nearby. This will make the whole process easier, and it will ensure that you won’t have to stop in the middle of the procedure to go grab something or hunt for a tool you might not have.
Here is what you need when painting over metal:
— A wire brush
—Finegrit sander or sanding block
—a dust sheet- to trap tiny particles and contain any mess
— a cloth
—white spirit
— a metal primer
— a metal paint, in the colour of your choice
—safety glasses— to protect eyes from fine particles
—protective gloves
—dust mask— to stop you from inhaling dust or dirt
Step 1: Once you have your tools at the ready, it’s time to get acquainted with your metal surface. Look for rusted areas, or places where paint is peeling— these will be where much of your initial attention will be focused. If the item is movable, place the item in a well-ventilated area. Otherwise, ensure to open the windows and get a good air flow within the room. Place the dust sheet under the item so it will catch the particles and make for much easier clean up!
Step 2: Now that you have the preparations in order, you’ll begin the real work. Use your wire brush to remove rust and old, crusted paint. You want your painting surface to be as smooth as possible, so apply as much pressure as needed to brush away imperfections from the metal surface. Be sure to check all sides of the metal object to ensure you haven’t missed a spot! For these first few steps particularly, it’s important to be wearing your safety glasses and dust mask. You want to make sure that your eyes and airways are protected from particles.
Step 3: Once the larger, more obvious areas have been abraded away with your wire brush, you’ll use your sander to smooth the area further, and give yourself an even better canvas on which to paint. If you’re looking for a quality sander, we love the ProDec Hand Sander Tool. This quality tool securely holds abrasive paper in place, while a dense foam underside will provide even contact with the surface in question.
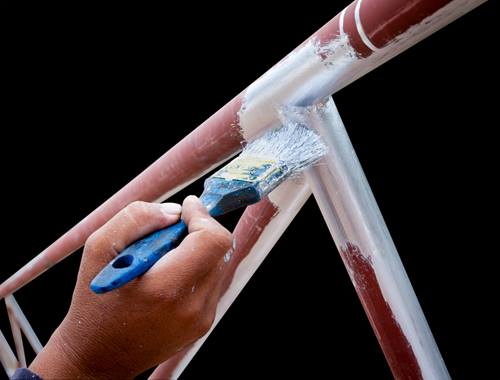
Step 4: When your item has been sanded and smoothed as much as possible, turn to your trusty White Spirit solution to degrease the object and clean the area for priming and painting. Be sure to wear your gloves while you do this. If you don’t have white spirits to hand, you can use a damp cloth to thoroughly clean the area of any particles. You’ll want a clean slate for the next steps, so take care to wipe around and within the cracks and crevices!
Step 5: Now it’s essential to let your metal furnishing fully dry. If the metal isn’t completely dry, the primer and paint won’t adhere properly. Grab yourself a cuppa tea or two— after all, watching paint dry isn’t the most exciting of activities! Maybe take some time to look at some of our featured projects, check out our wide range of products to help strengthen your toolkit, or scroll through some of the design articles on Crown Paints to get inspiration for your next big project!
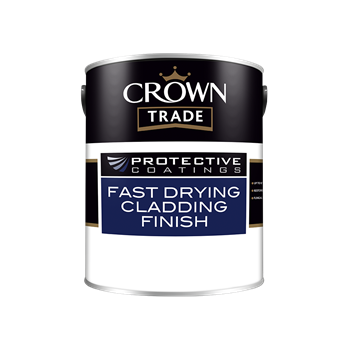
Step 6: Once your metal has completely dried through, it’s time to apply your primer. Ensure your primer is specially formulated for use on metal surfaces. The Crown Trade Universal Metal Primer is suitable for use on most ferrous and non-ferrous metals, alloys, and properly prepped galvanised steelwork. This makes the product ideal to have on hand for interior or exterior use. If the surface you’re painting has intricate detailing or a lot of nooks and crannies, you may find a spray primer works best. Follow the instructions on your metal primer regarding drying time and application. In general, you’ll be looking at around 24 hours of drying time.
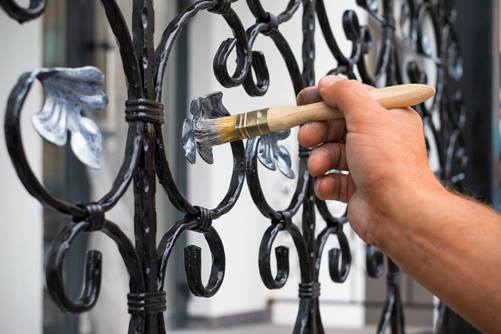
Step 7: After the primer comes the part you’ve been waiting for! The painting! If you’ve prepped properly, this task will be a breeze. You’ve already selected your metal paint and colour, so use your brush (the size of brush will depend on surface area and detailing— you may use brushes of varying sizes depending on the job) to paint your metal. Again, you want to use a paint that’s been developed specifically for metal. The Crown Trade Protective Coatings High Performance Gloss for Metalwork provides up to 15 years of protection for exterior metalwork and offers excellent UV resistance and adhesion. Furthermore, the formula leaves your metalwork looking sharp, with a glossy sheen. Again, the painting process will vary based on product, but as a rule of thumb we advise applying several light coats, allowing paint to dry for a few hours in between each one (another cuppa is on the cards!).
Step 8: Once the above steps are completed, it’s time to admire the product of your hard work. Sit back, relax, and take some time to marvel at your gorgeous metal creation! Who would have thought that painting metal could be so simple (and so enjoyable!)?
Did you use one of our brands to paint your metal? We want to see your project! Feel free to tag us on Instagram (@cdcireland) or Facebook. If you’ve enjoyed this tutorial on how to paint metal furnishings, be sure to share with your friends! Who knows— you could inspire them to transform their metal surfaces!